Sunday, December 24, 2017

Green Bean Casserole

Green Bean Casserole

Ingredients:

2 tablespoons butter
2 tablespoons all-purpose flour
1 teaspoon salt
1 teaspoon white sugar
1/4 cup diced onions
1 cup sour cream (1/2 cup sour cream will also work.  See Mark's Notes)
4 cans cut green beans (or French style green beans) drained
2 cups shredded Cheddar cheese

Topping:
1 to 1 1/2 cups buttery round crackers - crumbled
4 tablespoon butter

Instructions:
1.  Melt 2 tablespoons butter in large skillet.
2.  Stir in flour.
3.  Stir in the salt, sugar, onions, and sour cream.
4.  Add green beans.
5.  Stir green beans until coated.
6.  Pour green bean mixture into casserole dish.
7.  Sprinkle 2 cups cheddar cheese over green bean mixture.
8.  In a small bowl, mix the crumbled crackers and butter together.
9.  Sprinkle topping over the casserole.
10.  Bake for 30 minutes at 350 degrees - cheese should be bubbly.
11.  Enjoy

Mark's Notes:
This is a very simple recipe.  In hindsight, the 1 cup sour cream was a bit overwhelming.  If this got cut in half to 1/2 cup sour cream, that should work out a little better.

Mark's Story
We were hosting Christmas this year.  I was looking for some sides to make.  At Thanksgiving, I made a traditional green bean casserole with mushrooms and topped with onions.  My kids don't like mushrooms or onions very much.  They do like green beans.  So, I started looking for a green bean casserole without mushrooms or onions.  I came across this one.  It's really easy to make and quite delicious.  Enjoy.  Merry Christmas.  Jesus was born to bring us peace and forgiveness.  

Creamy Corn Casserole

Creamy Corn Casserole

Ingredients:

1 15 ounce can whole kernel corn, drained
1 15 ounce can cream style corn
1 8 ounce package corn muffin mix
1 cup sour cream
1/2 stick butter, melted
1 to 1 1/2 cups shredded Cheddar

Instructions:

1.  In large bowl, stir together the 2 cans of corn, corn muffin mix, sour cream, and melted butter.
2.  Pour into a 9x13 inch casserole dish.
3.  Bake for 45 minutes or until golden brown.
4.  Remove from oven and top with Cheddar cheese. 
5.  Return to oven for 5-10 minutes - until cheese melts
6.  Let stand for five minutes and serve warm.

Mark's Notes:
This recipe is from Paula Deen from the Food Network.
Other recipes similar to this suggest that the ingredients could be easily doubled without much more cooking time.  I will need to try that later.

Mark's Story:
Well, there are two parts to this story.  Most recently, we were hosting Christmas 2017.  I was looking for sides to make.  Trish suggested a creamed corn casserole.  So, I started looking for recipes.  The second part to this story is that when I was a kid, my grandmother made a creamed corn casserole that I really really liked.  Unfortunately, I'm not sure what her original recipe was.  However, this creamed corn casserole is very easy to make, doesn't take a lot of time, and is really good.  Enjoy.

I made it.  Everyone ate it.  And I didn't get a picture of it.  I'll just have to make it again.  Merry Christmas.  Jesus was born to bring peace and forgiveness to all that believe in him.

Tuesday, October 10, 2017

Apple Slab Pie

Apple Slab Pie:


This recipe has 3 layers to it.  For each layer, I list the ingredients just for that particular layer along with the corresponding instructions just for that layer.

1st Layer:
Ingredients (just for the 1st layer):
1 1/2 cups flour
1 3/4 cups sugar
1/4 teaspoon salt
1/2 teaspoon baking powder
1/2 cup butter softened
2 egg yolks
4 tablespoons water

Instructions:
1.  Mix flour, sugar, salt, and baking powder together
2.  Use pastry blender to cut in the butter
3.  In a small bowl, mix egg yolks and water together
4.  Pour the egg-water mix into flour
5.  Mix until it forms a ball
6.  Grease a 10x15 inch pan
7.  Spread the dough mix across the pan


2nd Layer:
Ingredients (just for 2nd layer):
8 peeled apples (we prefer Fuji apples; use whatever apples you enjoy)
2 tablespoons lemon juice
2 tablespoons flour
1 1/2 tablespoons sugar
1/2 teaspoon cinnamon

Instructions:
1.  Peel apples
2.  Place peeled apples in a large bowl
3.  Add 2 tablespoon lemon juice, 2 tablespoons flour, 1 1/2 tablespoons sugar, and 1/2 teaspoon cinnamon
4.  Mix it well
5.  Spread evenly over 1st layer

3rd Layer:
Ingredients:
1 cup flour
1 teaspoon cinnamon
2/3 cup brown sugar (or 1/2 cup white sugar)
2/3 cup to 3/4 cup butter softened


Instructions:
1.  Mix flour, cinnamon, and sugar together
2.  Using a pastry blender, cut in butter until it is crumbly
3.  Spread evenly over the apple layer


Baking Instructions:
1.  Pre-heat oven to 350 degrees
2.  Bake for 60 minutes or until topping is golden brown

Mark's Story:
My wife's workplace was having everyone bring a dish for homecoming week.  One of the items on the list was an Apple Slab Pie.  Trish asked me what an Apple Slab Pie was.  I had to look it up.  I explained what it was.  At first Trish told me that she would find something easier.  I kept reading over different recipes, and I told her that I could do this.  So, I made a batch.  I did not get to sample it.  Trish texted me the next day telling me that everyone at work loved it.  Now, I need to make another batch for us to enjoy at home. 

Mark's Notes:
The recipe I used comes from Allrecipes.com.  Although the way they listed the ingredients was confusing as to when those ingredients would be used for which layer.  The way I split it out makes more sense to me. 


Here is the link to the original recipe:


Saturday, July 29, 2017

Chocolate Chocolate Chip Muffins

Chocolate Chocolate Chip Muffins


Ingredients:

1 3/4 cups all purpose flour
2 teaspoons baking powder
1/2 teaspoon baking soda
2 tablespoons best quality cocoa
3/4 cup superfine sugar
3/4 cup semisweet chocolate chips
plus 1/4 cup for sprinkling
1 cup milk
1/3 cup + 2 teaspoons vegetable oil
1 egg
1 teaspoon pure vanilla extract

Instructions:

1.  In a large bowl, mix together the flour, baking powder, baking soda, cocoa, and sugar.
2.  Stir in the 3/4 cup chocolate chips.
3.  In a medium sized bowl, whisk the milk, egg, vegetable oil, and vanilla extract.
4.  Add the wet ingredients to the dry ingredients and stir together (but don't over-mix it either.  should be a little lumpy)
5.  Pre-heat oven to 400 degrees.  
(see Mark's notes - 375 degrees worked better for us).
6.  Take a 12 muffin tin and line it with paper muffin cases.
7.  Spoon the batter evenly into the muffin pan.
8.  Using the 1/4 cup chocolate chips, evenly sprinkle those on top of the muffins.
9.  Bake for 20 minutes or until the muffins have risen and an toothpick inserted comes out clean.  (see Mark's Notes - 15 minutes worked better for us).
10.  Remove from muffin tin and let cool.
11.  Enjoy.

Mark's Story (or Miriam's Story)
For one of her 4H projects, Miriam decided she wanted to make chocolate muffins.  So, I did a Google search and found this recipe from the Food Network.  I gave her the recipe, and she did everything herself.  I just supervised and I was not allowed to help. 

Miriam used the mise en place method - she measured out all of her ingredients into separate bowls before starting.  Once she had everything measured out, she mixed together all the dry ingredients in one bowl, then mixed together all the wet ingredients in another bowl, and then combined the wet ingredients with the dry ingredients.

She did a practice batch that turned out slightly overdone.  The final batch was perfect.  

Mark's Notes:
The practice batch was baked at 400 degrees for 20 minutes, and the muffins were over-done.  So, for the final batch, we decided to bake them for 15 minutes at 375 degrees and that was perfect.

Here is the link to the original recipe from The Food Network:


Blueberry Granola

Blueberry Granola (not Granola bars...just granola)


Ingredients:
4 cups oatmeal
1 cup flaked coconut
1/2 cup chopped walnuts
1/2 cup chopped pecans
1/4 cup chopped almonds
1 cup dried blueberries
1/2 cup dried cranberries
1/2 cup dried cherries
1/2 cup all-bran cereal
1/4 cup sesame seeds
1/2 cup corn oil
1/2 cup pure maple syrup
1/2 teaspoon pure vanilla extract
1/4 teaspoon salt

Instructions:
1.  Pre-heat oven to 325 degrees
2.  Mix the oatmeal, coconut, walnuts, pecans, almonds, blueberries, cranberries, cherries, all-bran cereal, and sesame seeds together.  (The first 10 ingredients).
3.  Mix the corn oil, maple syrup, vanilla extract, and salt together.
4.  Pour the wet ingredients over the dry ingredients and stir.
5.  Grease a 13x9 casserole dish
6.  Spread the granola mix evenly in the casserole dish
7.  Bake for a total of 35 minutes.  After the first 20 minutes, gently stir, and then bake for the remaining 15 minutes.

Mark's Notes:
1.  I did not use sesame seeds.
2.  I used olive oil rather than corn oil
3.  I used regular raisin bran cereal for the "all bran cereal"
4.  I couldn't find dried cranberries, but I did find a bag of mix of dried cranberries and other dried fruits and so I used that.  
Mark's Story:
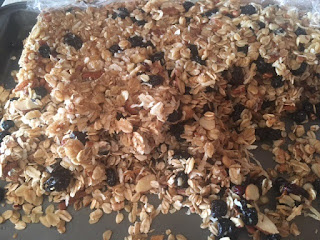
We spent the 4th of July weekend camping at Wilderness State Park near Mackinaw.  While there, I bought a baking book where all the recipes used blueberries.  I wanted to make blueberry granola bars.  At first I thought this recipe was the blueberry granola bar recipe.  I made it and it didn't look like it would cut into granola bars very easily.  So, I re-read the recipe, and this is essentially a blueberry-granola mix/cereal.

Everyone loved this.  The kids loved it.  It can be used as a snack. It can be used for breakfast.  It is super healthy.

In the near future, I plan on making the actual blueberry granola bars.

Monday, February 13, 2017

Testing Chocolate Chip Cookies with honey

Cook's Illustrated The Perfect Chocolate Chip Cookie (made more perfect by me, Mark)


Recipe makes 24 cookies


Ingredients:

2 cups flour
1/2 teaspoon baking soda
1/4 teaspoon baking powder
14 tablespoons unsalted butter - softened
1/3 cup honey
1 cup granulated sugar
1 teaspoon salt
2 teaspoons vanilla extract
1 large egg
1 large egg yolk
1 cup mini-semisweet chocolate chips 

1.  Whisk flour, baking soda, baking powder and salt in bowl.
2.  In separate bowl, add butter, honey, and sugar in a bowl and mix.
3.  Add vanilla, egg and egg yolk and stir.
4.  Slowly stir the flour mix into the sugar mix.
5.  Add chocolate chip cookies and stir.
6.  Bake cookies of 10 minutes.


Instructions:
1.  Cover two baking sheets with parchment paper, then set aside.
2.  Pre-heat oven to 375 degrees.
3.  Whisk flour and baking soda in medium bowl, then set aside.
4.  Melt 10 tablespoons butter in 10 inch skillet over medium-high heat.
5.  Continue cooking and swirling butter constantly until butter is dark golden brown with nutty aroma (1 to 3 minutes).
6.  Transfer browned butter to large heatproof container.
7.  Add remaining 4 tablespoons butter and stir until completely melted.
8.  Add brown sugar, granulated sugar, salt, and vanilla extract to melted butter.
9.  Whisk until fully incorporated.
10.  Add egg and egg yolk.
11.  Whisk until mixture is smooth with no sugar lumps remaining - about 30 seconds.
12.  Let sit for 3 minutes.
13.  Repeat steps 11 and 12 two more times - (whisk for 30 seconds, sit for 3 minutes, whisk for 30 seconds, and sit for 3 minutes).
14.  Mixture should now be thick, smooth, and shiny.
15.  Using a rubber spatula, stir in flour mixture (from step 3) until just combined - about 1 minute.
16.  Stir in chocolate chips (and nuts)
17.  Give dough final stir to ensure there are no flour pockets remaining and ingredients are evenly distributed.
18.  Working with 3 tablespoons of dough at a time, roll into balls and space them about two inches apart on prepared sheets.
19.  Bake cookies, 1 sheet at a time, until golden brown, still puffy, and centers are soft - 10 to 14 minutes.  Rotate sheet halfway through.
20.  Let cookies sit on sheet for five minutes, then transfer to wire rack.
21.  Let cookies cool completely before serving.
22.  Enjoy!

Mark's Notes
1.  I did not use brown sugar.  I used all granulated sugar (Trish is allergic to molasses which is in brown sugar).
2.  I used dark chocolate chips rather than semi-sweet chocolate chips.
3.  I did not use the optional pecans or walnuts.
4.  For a "fluffier" cookie, try this recipe with 2 cups bread flour.

Mark's Story
This turned out to be an exercise in teamwork.  I asked Abby if she wanted to help me and she said yes.  Then Miriam said she wanted to help too and I told her yes as well.  Then Abby tried to back out of it so she wouldn't have to be around the "annoying younger sister".  I made both of them wash their hands and gave both different assignments for stirring and mixing.  So, both kids helped out and the cookies were really really good.

The only mishap that I have to report on this recipe is that I spilled vanilla extract on my Cook's Illustrated magazine recipe.  I go to clean it up and it took some of the ink with it - still readable though. So, now I have their wonderful recipe for Perfect Chocolate Chips posted here and I made it more perfect with the dark chocolate chips.

I highly recommend looking up the actual article "The Perfect Chocolate Chip Cookies" by Charles Kelsey to read about why this particular process he developed makes the Perfect Chocolate Chip Cookie.  

Kelsey, Charles. “The Perfect Chocolate Chip Cookie”
Cook's Illustrated Revolutionary Recipes

http://www.handletheheat.com/the-ultimate-guide-to-chocolate-chip-cookies/


Upside Down Pineapple Muffins

Upside Down Pineapple Muffins

Ingredients:

Upside Down Part:
4 tablespoons reduced fat margarine
1/2 cup brown sugar (see Mark's Notes)
1 teaspoon cinnamon
6 pineapple slices

Cake Part:
1 1/2 cups all purpose flour
2 teaspoons baking powder
6 tablespoons reduced fat margarine
1 cup sugar
2 teaspoons vanilla
2 large egg whites
1/2 cup pineapple juice (reserved from can)
1/2 cup low-fat milk

Instructions:

Topping part:
1.  Melt margarine over medium heat.
2.  Add brown sugar and cinnamon
3.  Stir until sugar has melted.
4.  Remove from heat.
5.  Grease muffin pan  - especially the bottom really well.
6.  Cut the pineapple slices into quarters
7.  Place two pineapple quarters at the bottom of each muffin cup.
8.  Pour a tablespoon of brown sugar mix over the pineapples in the muffin cups.

Cake batter:
9.  Pre-heat oven to 350 degrees.
10.  In a large bowl, sift flour and baking soda.
11.  Set the flour/baking soda mix aside.
12.  In a medium bowl, beat margarine and sugar until light and fluffy - 30 seconds to 1 minute on low speed.
13.  Stir vanilla into the margarine/sugar mix.
14.  Add the egg whites to the margarine/sugar mix and beat well - 1 minute on medium speed.
15.  In a small bowl, combine the pineapple juice and milk.
16.  At this point, you will have the large bowl with the dry ingredients, then a medium bowl with the margarine/sugar mix, and a small bowl with the pineapple juice/milk mix.
17.  Fold in 1/3 of the margarine/sugar mix into the dry ingredients.
18.  Fold in 1/3 of the pineapple juice/milk mix into the dry ingredients bowl.
19.  Repeat steps 17 and 18, folding in the wet ingredients into the dry ingredients.
20.  Stir it all together until just combined.
21.  Pour batter into muffin tin over topping mix.
22.  Bake for 20 minutes or until muffins are done and a toothpick inserted comes out clean.
23.  Let cool for 10 minutes.
24.  Using a icing knife, cut along the edges of each muffin to loosen all of them.
25.  On a large flat pan, flip the muffin tin over onto this, and the muffins should come out.
26.  The pineapples should be on top now.
27.  Enjoy.
28.  Remember that Jesus loves you!!

Here is the link to the original recipe:


Mark's Notes - 
Abby was looking for a 4-H project.  She wanted to come up with a unique idea for muffins.  She likes Upside Down Pineapple Cake and she likes pineapples, and so we suggested Upside Down Pineapple Muffins.  I did some research and I found the above recipe.

Normally, we do not bake with brown sugar; however, these were being submitted for a formal competition and so we used the brown sugar.

Abby made a practice batch Thursday night.  The original instructions say that you only need 1 8 ounce can of pineapple slices.  I believe that that is incorrect as there were not enough pineapple slices for all 12 muffin cups in the muffin pan.  This is why in this ingredient list I stated that you need 6 pineapple slices.

So, Abby's first batch only made 8 muffins due to the lack of the pineapples.  They were delicious.  For the final batch that she made on Friday, we made sure she had enough pineapples.

The 4-H judges really liked it.  They gave her a Blue Ribbon and an Honors Ribbon.


Unfortunately, Abby was eating like one of these every morning.  Later in the day, she was complaining about a stomach ache.  We learned from this experience that Abby has Trisha's intolerance to brown sugar. 


Next time when I make these, I won't use brown sugar.  For the topping that goes over the pineapples, I was going to try using honey.  I will let everyone know how that turns out.

Also, this recipe uses margarine.  Based on everything I've read, you really shouldn't bake with margarine and use real butter for baking.  This turned out well enough.  Maybe I will try it with butter as well next time.

While working on this recipe, we got into a discussion on what was the difference between a cupcake and a muffin.  I did some quick Google searches and it appears that a cupcake uses a cake batter and a muffin uses some type of bread batter - either a quick bread batter or a yeast batter.  The cupcakes should be light and fluffy like a cake and the muffins should be more dense.  So, knowing that, honestly, this recipe reads more like a cake recipe than a muffin recipe.  The title uses the word "Muffin"; however, in the original instructions, it refers to the batter as a "Cake" batter.  Either way, it was delicious.

So, hope you enjoy reading my blog, trying these recipes, learning a few things as I am.  Most importantly, enjoy this yummy treats, and remember that Jesus loves you - always.


Ratatouille Chicken - slow cooker style

Ratatouille Chicken or Ratatouille Chicken Chili - for the slow cooker/crockpot


Ingredients (from the original recipe):

2-3 pounds of chicken breast
1/2 teaspoon salt (optional)
1/2 teaspoon black pepper (optional)
1 tablespoon olive oil
1 1/2 tablespoon minced garlic
1 cup minced yellow onion
2 1/4 cup crushed tomatoes
2 cups all natural chicken broth
1 tablespoon honey
1 small green pepper chopped
8 ounces of chopped carrots
2 yellow squash, sliced
2 tablespoons flour

Mark's Notes:
Over time, my family has modified the ingredients to the following:
2-3 pounds of chicken breast
1 tablespoon olive oil
1 1/2 tablespoon minced garlic
1 cup minced yellow onion
2 large cans of crushed tomatoes
2 cups all natural chicken broth (I've used 2 cups water if I don't have chicken broth readily available).
1 tablespoon honey
1 green pepper, 1 red pepper, and 1 yellow pepper -  chopped
2 bags of frozen squash
2 tablespoons flour (I've forgotten this ingredient numerous times)

This is a very versatile recipe.  You can add in or take out whatever vegetable you like or don't like.  Ratatouille by itself is a vegetable dish that is best for a lunch and/or served with a sandwich.  Adding the chicken makes it a substantial dinner dish.

Below are the optional ingredients to give it a chili flavor to it.  I don't usually add these ingredients as I don't like it spicy.  When I've added these, I've cut the amount in half so it has some spice but not by any means overwhelming.  The original recipe with the onion, garlic, pepper adds quite a bit of flavor on its own.


Optional Ingredients for Ratatouille Chicken Chili
1 teaspoon cayenne pepper
1/2 teaspoon paprika
1/2 teaspoon dried oregano
1/2 teaspoon cumin
For less spicy chili, cut these ingredients in half.

Optional Toppings:
Avocado
Cheese
Crackers


Instructions:
1.  Place chicken breast in slow cooker/crockpot
2.  Optional - For the Chili - sprinkle all the optional ingredients for Ratatouille Chicken Chili over the chicken.
3.  Heat 1 tablespoon olive oil over medium-high heat in a large frying pan.
4.  Place the minced onions and minced garlic in frying pan.
5.  Let the onion and garlic cook for three minutes.
6.  After three minutes, dump the onion and garlic over the chicken in the slow cooker.
7.  Pour the crushed tomatoes over the chicken.
8.  Pour in the 2 cups of chicken broth.
9.  Pour 1 tablespoon of honey into the chicken tomato mix.
10.  With a spatula, carefully, mix everything together.
11.  Top everything off with the peppers, squash, and carrots, and/or whatever other vegetables you may be using.
12. Leave the veggies on the top.
13.  Set the slow cooker/crockpot to low and let cook for 7-8 hours.
14.  When the 7-8 hours is done, remove the chicken and shred.
15.  Before putting the chicken back in, pour in the 2 tablespoons of flour and stir.
16.  Place the shredded chicken back into the slow cooker.
17.  You can top off the ratatouille with cheese, avocados, crackers, or just leave it as is.

Mark's Story:
For awhile, I've been making Ratatouille.  However, as a vegetable dish, it makes either a nice side or a light lunch.  To make the meal more substantial, I had been cooking turkey meat and then adding that to the Ratatouille vegetable mix.  Then one day, where I work at, we had a Chili day.  Everyone brings in their own Chili dish to share.  I wanted to make a Ratatouille Chili.  So, I started doing some Google searches and I found this Ratatouille Chicken Chili.  Everyone seemed to like it.  After I made it for work, I made another batch for dinner at home - except that batch for at home did not have any of the Chili seasonings.  My wife thought it was too bland.  I thought it was fine.  She mixed up the chili ingredients herself and sprinkled some over her bowl.  She really liked that. 

Mark's Suggestions:
You can add as much vegetables as you want to this dish.  You can easily double the amount of carrots and/or squash going into this.  You can use a red pepper instead of a green pepper or use both a red pepper and a green pepper.  For the chili spices, you can use the recommended amount, cut them in half, or not use any at all to make a very simple Ratatouille Chicken dish.  This could be really good if you want a healthy meal without a lot of spices that could upset one's stomach.  This recipe is extremely versatile.

Mark's Mistakes (very minor mistakes this time):
The second time that I made this for dinner at home, I forgot the 2 cups chicken broth.  That got added after it had been cooking for a few hours.  I also forgot the honey and the flour.  It still turned out really well.  As I just mentioned previously, extremely versatile recipe.

Enjoy.  Remember - Jesus loves you!!

Here is a link to the original recipe:
http://www.perchancetocook.com/2014/10/13/shredded-chicken-ratatouille-chili-paleo-gf/